How to Self‑Host a Stable Shopify App Dev Tunnel with FRP + Cloudflared (Fixed Port Mode)
.jpg)
Watch Video Tutorial
How to Self‑Host a Stable Shopify App Dev Tunnel with FRP + Cloudflared (Fixed Port Mode)
This guide shows—step by step and beginner‑friendly—how to run your Shopify app in “fixed port” tunnel mode using FRP (Fast Reverse Proxy) plus Cloudflared. We’ll walk through the trial‑and‑error we used to reach the final working setup, explain common pitfalls, and give you reliable steps you can follow even if you don’t write code.
Why this? Shopify CLI’s default tunnel can assign random local ports. In some corporate, school, or ISP‑restricted networks, NGROK and random ports make reverse proxies unreliable. Our FRP + Cloudflared setup keeps a stable, fixed local dev port and a predictable public domain so your app preview remains accessible.
At a glance (the traffic path):
- Browser → Cloudflare Edge → Cloudflared (on your server) → FRPS (server side of FRP) → FRPC (on your laptop/desktop) → Shopify CLI dev proxy → Vite/React Router dev server (port 3001)
We’ll use:
- A public server (e.g., a VPS in the US) for FRPS and Cloudflared
- Your local Windows/macOS/Linux machine for FRPC and the Shopify app dev server
- A domain on Cloudflare (e.g.,
tunnel.example.dev) for clean HTTPS
Note: We keep FRPS deployment brief here; we have a separate deep‑dive post you can follow for the server side.
1) FRPS (Server‑Side FRP) — Brief Setup and Link
FRPS is the server component of FRP. You run FRPS on your public server; it accepts connections from your local FRPC and forwards traffic.
- Control port: FRP 0.65 defaults to
7000(can be TLS or non‑TLS; we’ll cover matching settings later) - Data ports: You can expose
8080(HTTP) and443(TCP/HTTPS) at FRPS to forward to your local FRPC
We have a separate article with full FRPS setup, systemd service, firewall rules, and hardening:
For this tutorial, assume:
- FRPS is reachable at your public IP (e.g.,
145.79.2.104) - FRPS control port is
7000 - FRPS defines or allows proxies on
8080and443that we will bind via FRPC - FRPS uses a shared
tokenfor auth
2) Cloudflared (Cloudflare Tunnel) — Latest, Clear, Click‑By‑Click
Goal: Route https://tunnel.example.dev through Cloudflare to your server’s FRPS on 8080, which will forward the traffic to your local machine via FRPC.
Prerequisites:
- You have a Cloudflare account
- Your domain is added to Cloudflare DNS (nameservers pointing to Cloudflare)
- You can access the Cloudflare Zero Trust dashboard
Step‑by‑step (2024/2025 UI layout):
- Open Cloudflare Dashboard
- Go to
dash.cloudflare.comand select your account - Ensure your target domain (e.g.,
example.dev) is in Cloudflare
- Go to
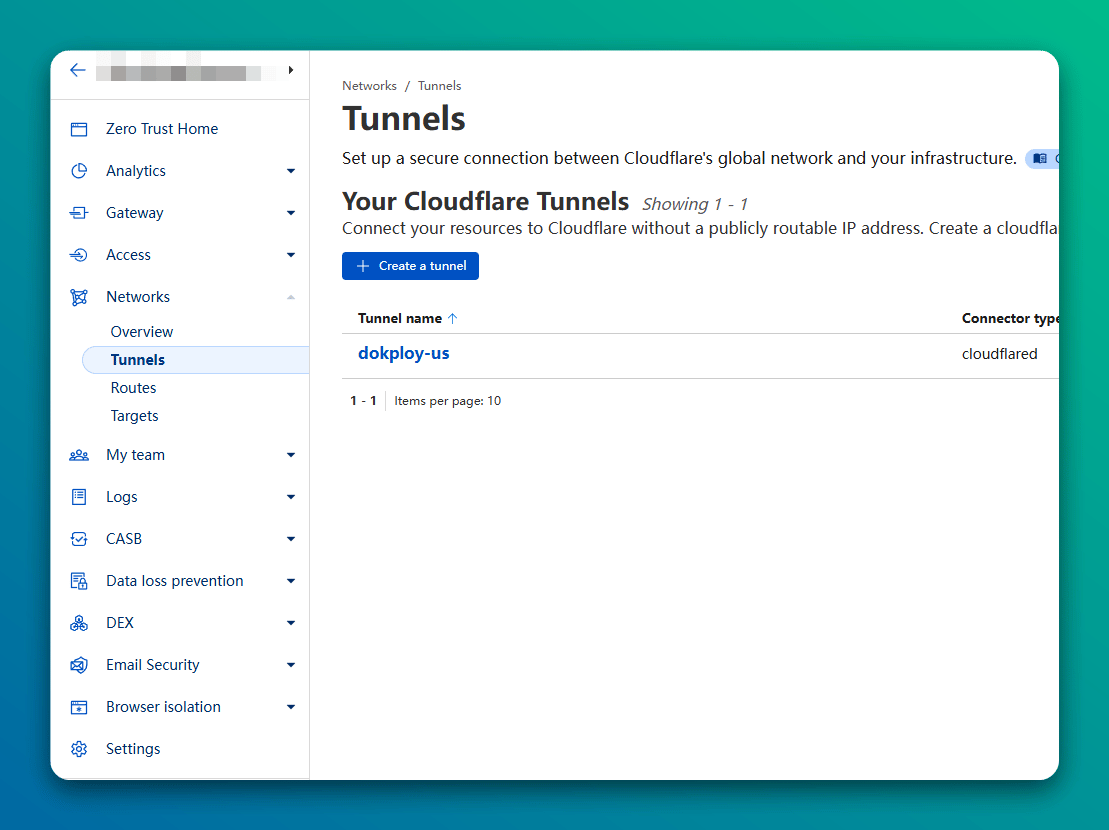
- Open Zero Trust → Networks → Tunnels
- In the left sidebar, click “Zero Trust”
- In Zero Trust, locate “Networks” → “Tunnels” (Cloudflare Tunnel)
- Create a Named Tunnel
- Click “Create a tunnel”
- Name it, e.g.,
shopify-dev-fixport - Choose “cloudflared” connector
- Click “Next”
- Install & Run cloudflared on your server
- On Ubuntu/Debian:
sudo apt update && sudo apt install cloudflared
- In the Tunnel creation screen, Cloudflare shows a one‑line command with a token. Copy that exact command and run it on your server:
- Example:
cloudflared service install <YOUR_TOKEN> - Or:
cloudflared tunnel --no-autoupdate run --token <YOUR_TOKEN>
- Example:
- After a few seconds, the dashboard should show your connector as “Healthy”
- On Ubuntu/Debian:
- Add a Public Hostname route to FRPS HTTP port
- In the tunnel’s details page, click “Add public hostname”
- Hostname:
tunnel.example.dev - Type:
HTTP - Path:
/ - Service:
http://127.0.0.1:8080(this is on your server, where FRPS listens for HTTP) - Save
- Cloudflare will auto‑create a proxied DNS record (a CNAME to the tunnel). No manual DNS needed.
- SSL/TLS Mode on Cloudflare
- If your origin (server’s FRPS) does not serve TLS at
8080, use “Flexible” SSL mode - If you need “Full/Strict”, you must terminate TLS on the origin (e.g., a reverse proxy like Nginx/Caddy in front of FRPS, or FRPS/FRPC configured for TLS where appropriate)
- If your origin (server’s FRPS) does not serve TLS at
- Quick test on your server
- Run on the server:
curl -sv http://127.0.0.1:8080/ -H "Host: tunnel.example.dev" - Expected: HTML or a 302 from your app (once FRPC is connected). If you get “Empty reply”, FRPC probably isn’t yet forwarding to your local dev port—continue to step 3.
- Run on the server:
Why this works: Cloudflared keeps a persistent, outbound tunnel to Cloudflare’s edge. Requests to tunnel.example.dev enter the tunnel and reach http://127.0.0.1:8080 on your server. FRPS then forwards the TCP stream to your local machine via FRPC.
3) FRPC (Local FRP Client) — Exact Configuration & Troubleshooting
Goal: Map FRPS’s 8080 and 443 to your local fixed dev port (we use 3001).
Download & verify FRP client (Windows):
- Download FRP 0.65.0 Windows AMD64 ZIP from the official releases
- Extract it somewhere in your project (e.g.,
frp_0.65.0_windows_amd64/) - If Windows blocks the EXE:
- Open PowerShell in the folder and run:
Unblock-File -Path .\frpc.exe
- Open PowerShell in the folder and run:
- Verify version:
./frpc.exe -v→ expect0.65.0
Create/edit frpc.toml (client config):
serverAddr = "<YOUR_FRPS_PUBLIC_IP>"   # e.g., 145.79.2.104
serverPort = 7000                      # FRPS control port (default 7000)

[transport]
tls.enable = false                     # set true if FRPS control port uses TLS

[auth]
method = "token"
token = "<YOUR_SHARED_TOKEN>"

[[proxies]]
name = "dev-http"
type = "tcp"
localIP = "::1"                        # or "127.0.0.1" (see IPv6 note below)
localPort = 3001                       # your local dev server port
remotePort = 8080                      # FRPS HTTP data port

[[proxies]]
name = "dev-https"
type = "tcp"
localIP = "::1"
localPort = 3001
remotePort = 443                       # FRPS TCP/HTTPS data port
IPv4 vs IPv6 (important):
- Some dev servers only listen on IPv6 loopback
::1and not on IPv4127.0.0.1. If FRPC tries127.0.0.1:3001and you see “actively refused”, it might be IPv6‑only. - Windows: check with PowerShell →
Get-NetTCPConnection -LocalPort 3001 -State Listen- If
LocalAddressis::1, setlocalIP = "::1"infrpc.toml
- If
- Linux/macOS:
ss -ltnp | grep 3001ornetstat -lntp | grep 3001
Start FRPC:
- From the folder:
./frpc.exe -c .\frp_0.65.0_windows_amd64\frpc.toml - Logs should show: “login to server success” and “start proxy success” for
dev-httpanddev-https
Troubleshooting common errors:
tls: first record does not look like a TLS handshake→ Your FRPS control port isn’t TLS. Settls.enable = false(or enable TLS on FRPS and set true here).token mismatch→ Thetokenin FRPC must match FRPS’s configured token.actively refusedto127.0.0.1:3001→ Your dev server isn’t listening there. Check IPv6 vs IPv4 or confirm the port.
4) Shopify CLI & Vite — Fix the Dev Port, Make CLI Happy
We want the local dev server to always start on a fixed port (e.g., 3001).
- Vite config (React Router project)
Update vite.config.ts to fix port and allow your tunnel host:
import { reactRouter } from "@react-router/dev/vite";

import { defineConfig, type UserConfig } from "vite";

import tsconfigPaths from "vite-tsconfig-paths";


const host = new URL(process.env.SHOPIFY_APP_URL || "http://localhost").hostname;


let hmrConfig;

if (host === "localhost") {

  hmrConfig = { protocol: "ws", host: "localhost", port: 64999, clientPort: 64999 };

} else {

  hmrConfig = { protocol: "wss", port: 3001, clientPort: 443 };

}


export default defineConfig({

  server: {

    allowedHosts: [host],

    port: 3001,

    strictPort: true,

    hmr: hmrConfig,

  },

  plugins: [reactRouter(), tsconfigPaths()],

}) satisfies UserConfig;- Environment
- Set
SHOPIFY_APP_URL=https://tunnel.example.devin your.envfor local dev - Shopify CLI uses this for its preview URL and host checks
- Shopify CLI command (dev)
- Use the tunnel URL only:
shopify app dev --tunnel-url=https://tunnel.example.dev:443 --verbose
- Don’t pass
--localhost-port. When you use a custom tunnel, the CLI picks the right local proxy behavior; forcing--localhost-portcan conflict with the tunnel.
- Optional: speed up startup by trimming pre‑dev/migrations
In shopify.web.toml:
[commands]

predev = "node scripts/dev-pre.cjs"

dev = "npm exec react-router dev"

And add scripts/dev-pre.cjs:

// Only run `prisma generate` when schema changed or client missingconst { spawnSync } = require("child_process");

const fs = require("fs");

const path = require("path");


const schemaPath = path.resolve(process.cwd(), "prisma", "schema.prisma");

const clientIndexPath = path.resolve(process.cwd(), "node_modules", "@prisma", "client", "index.js");


function exists(p) { try { fs.accessSync(p, fs.constants.F_OK); return true; } catch { return false; } }


function needsGenerate() {

  if (!exists(schemaPath)) return false;

  if (!exists(clientIndexPath)) return true;

  const schemaMtime = fs.statSync(schemaPath).mtimeMs;

  const clientMtime = fs.statSync(clientIndexPath).mtimeMs;

  return schemaMtime > clientMtime;

}


if (needsGenerate()) {

  spawnSync("npx", ["prisma", "generate"], { stdio: "inherit", shell: true, env: process.env });

}
Why: running prisma migrate deploy every dev boot adds 10–60s even if there are no migrations. Generating Prisma client only when needed also saves time.
Startup sequence we recommend:
- Run:
shopify app dev --tunnel-url=https://tunnel.example.dev:443 --verbose - Ensure your local dev server shows “Local: http://localhost:3001/”
- Start FRPC:
./frpc.exe -c .frpc.toml - Open
https://tunnel.example.devand log in to your app preview
5) Improve Startup Speed Under Shopify Tunnel Mode
- Remove dev‑time migrations: don’t run
prisma migrate deployon every boot - Conditional Prisma generate: only regenerate when schema changed
- Pre‑bundle common deps: in Vite
optimizeDeps.include, addreact,react-dom,react-router-dom,@shopify/shopify-app-react-routerif cold starts feel slow - Antivirus exclusions (Windows): exclude your project folder to avoid heavy scanning during boot
- GraphiQL: if unused, consider avoiding starting it to reduce noise; Shopify CLI may start it automatically, but you can ignore it if not needed
Verification Checklist (Quick)
- Server:
curl -sv http://127.0.0.1:8080/ -H "Host: tunnel.example.dev"returns HTML/302 - FRPC logs: “login to server success”, “start proxy success”
- Local ports: PowerShell →
Get-NetTCPConnection -LocalPort 3001 -State Listenshows listening (IPv6::1or IPv4127.0.0.1) - Browser:
https://tunnel.example.devshows your app preview and allows login