How to Add Custom Policies & Services to Your Shopify Store
.jpg)
Watch Video Tutorial
"Besides Shopify's default policies, how can I add my own unique service policies? For example, a warranty, a lowest price guarantee, etc."
Honestly, my first thought was, "What's the real question here?"
But it quickly became obvious that this user's question revealed a fundamental issue many new store owners face: they don't truly grasp what "independent" means in "independent store." They're so used to following the rigid rules of marketplaces like Amazon or eBay that their thinking becomes boxed in.
Why Bother Adding Extra Policies?
For certain product categories and sellers, custom policies are essential for boosting brand competitiveness and improving customer service.
Take electronics, for instance. Do you offer a warranty? If so, what are the terms? A lifetime warranty? Imagine a customer seeing that—it could be the single thing that builds the trust needed to convert.
Or maybe you're a factory-direct seller. You know your prices are the lowest. So, you can create a "Lowest Price Guarantee" policy. "Find it cheaper elsewhere, and we'll refund the difference." Boom.
Effective, clearly displayed policies can significantly boost your brand's trustworthiness and conversion rates. Just be realistic and only promise what you can actually deliver. (Think about yourself as a shopper: are you more likely to buy from a store that offers a 7-day no-questions-asked return, or one that doesn't?)
How to Add a New Policy Page
Step 1: Add a New Page
In your Shopify admin, go to Online Store > Pages. Click Add page.

Give your new page a clear title, like "Warranty Policy" or "Price Match Guarantee." Shopify will automatically generate a URL handle (e.g., /warranty-policy).

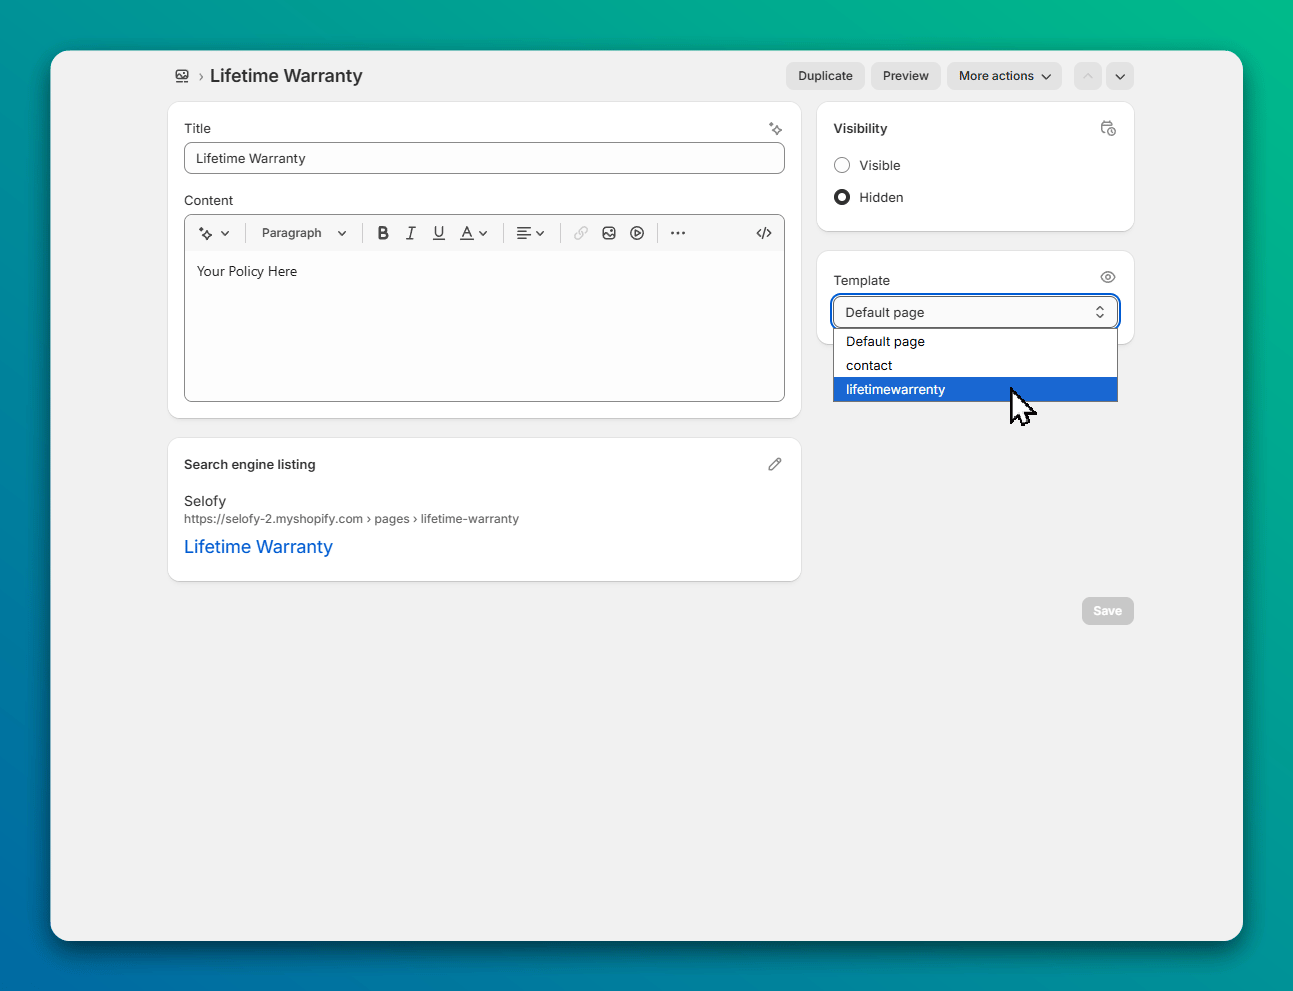
Step 2: Edit the Content
You have two main options here:
Option A: The Simple WayUse the default rich text editor right on that page. Just start typing. If you know a bit of HTML, you can click the <> icon to add more advanced formatting.
Option B: The Custom Design WayFor more control, you can create a custom template for this page. Go to Online Store > Themes > Customize. From the dropdown at the top, select Pages. Then, choose your new policy page and click Create template. This lets you build a unique layout using your theme's sections and blocks.
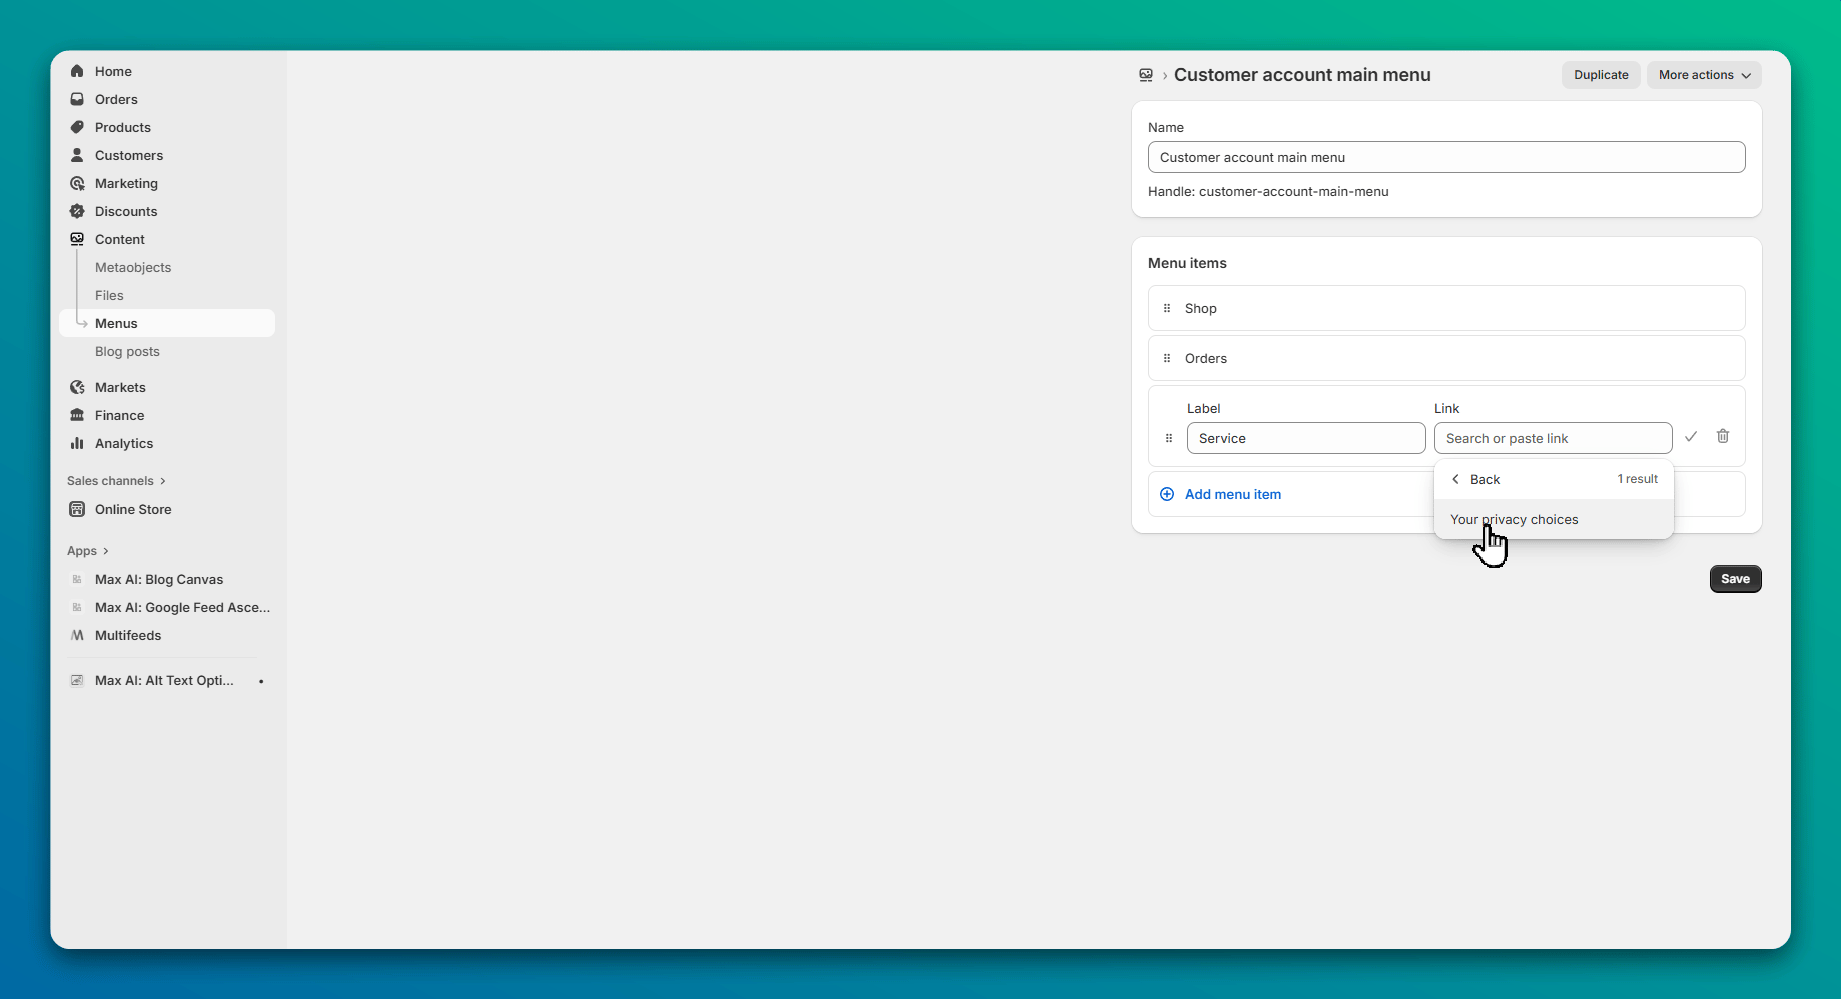
Step 3: Add It to Your Navigation
Once your page looks good and is published, add it to your store's navigation so customers can actually find it. Go to Online Store > Navigation, add it to your footer menu, and you're done.
You can also add icons, announcement bars, or whatever else you want to draw attention to your new policies.