4 Ways to Deploy n8n in 2025 – Free Forever, No Code Needed
.jpg)
Watch Video Tutorial
If you run a Shopify store, manage an e-commerce brand, or build digital products as a solopreneur, you’ve probably heard of n8n—the open-source, no-code/low-code workflow automation tool that connects your apps like Zapier, but without recurring fees.
But here’s the real question: How do you actually get n8n running?
Good news: In 2025, you have four practical, cost-effective options—including completely free methods that require zero coding. Whether you’re testing automation for your Shopify store or building a full AI-powered operations stack, there’s a perfect fit for you.
Let’s break them down.
🌐 Option 1: Official n8n Cloud – Zero Setup, Instant Start
Ideal for: Shopify store owners who want to test n8n risk-free with no technical setup.
- ⚡ Launch in seconds—no installation
- 💳 14-day free trial (no credit card needed)
- 🛡️ Fully managed: automatic updates, backups, and scaling
- 🔗 Perfect for connecting Shopify → Klaviyo → Google Sheets or other e-com workflows
💡 Pro Tip: Use the trial to automate your abandoned cart recovery, order sync, or inventory alerts. If it saves you 5+ hours/week, it’s worth the upgrade.
💻 Option 2: Local Deployment (On Your Laptop) – Free, But Limited
Only for: Quick testing or learning the n8n interface.
Not recommended for real e-commerce automation—your workflows will stop when your computer shuts down.
You’ll use Docker Desktop—a free application that lets you run complex software like n8n with just a few clicks. Think of it like an “app store for developer tools.”
💡 Why Docker?
“Docker makes installing open-source apps as easy as installing a mobile app—just click and run.”
📝 Step-by-Step Deployment Guide (No Code Required)
- Install Docker Desktop
- Go to docker.com
- Download and install Docker Desktop for your operating system (Windows or Mac)
- Launch the app after installation
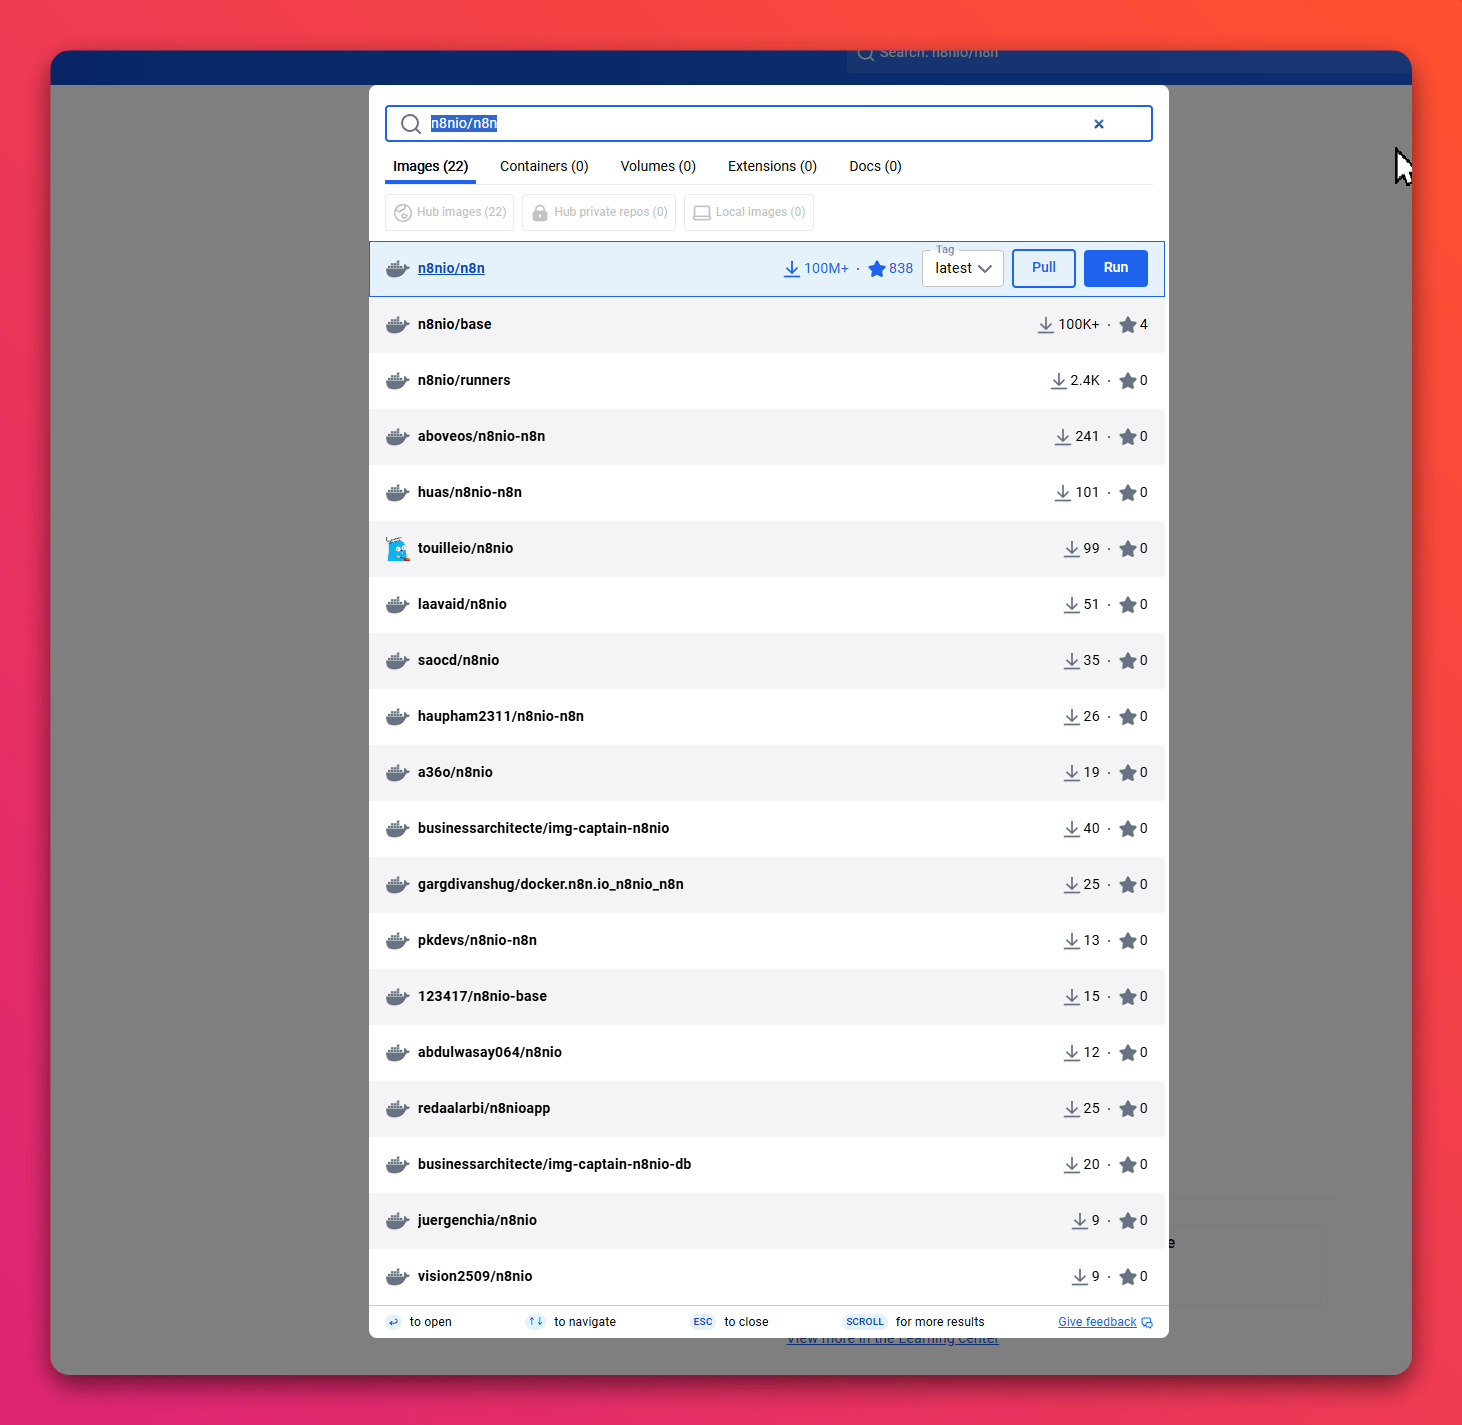
- Pull the n8n Docker Image
- Open Docker Desktop
- Click the “Images” tab on the left sidebar
- In the search bar, type
n8nio/n8n - Click the “Pull” button to download the official n8n image
-
- Create a Data Volume (for Persistent Storage)
- Click the “Volumes” tab
- Click “Create”
- Enter the name:
n8n_data - Click “Create” again
→ This ensures your workflows and settings won’t disappear when you restart n8n
- Run the n8n Container
- Go back to the “Images” tab
- Find
n8nio/n8nin your list and click “Run” - Configure the container with these exact settings:
- Port Mapping: Host port
5678→ Container port5678 - Volume Mount:
- Host path: select the
n8n_datavolume you just created - Container path:
/home/node/.n8n
- Host path: select the
- Port Mapping: Host port
- Click “Run” to start the container
- Access and Use n8n
- Open your web browser
- Go to: http://localhost:5678
- On first launch, you’ll be prompted to create an admin account
- ⚠️ Important: Use a real email address—you’ll receive an activation code to verify your account!
✅ That’s it! You now have n8n running locally.
✅ Pros:
- 100% free
- Great for learning workflows
❌ Why it’s NOT for e-commerce:
- ❌ No 24/7 uptime (your laptop must stay on)
- ❌ No public URL → webhooks from Shopify won’t work
- ❌ Can’t trigger automations when you’re offline
⚠️ Don’t use this for real store automation. It’s a sandbox—not a solution.
☁️ Option 3: Third-Party Cloud Hosting – Free Forever with ClawCloud
Best for: Budget-conscious Shopify entrepreneurs who need real, reliable automation.
ClawCloud Run is currently the most popular free hosting option for n8n in 2025—and here’s why:
- ✅ FREE $5 every month by GitHub verification(it offers Recurring Monthly $5 Credit for free, if Your GitHub account registered for 180+ day.) — no credit card needed
- ✅ Complete setup in under 1 minute
- ✅ Enough to run n8n 24/7 (~$4/month usage) → effectively free forever
- ✅ Public URL + webhook support → works perfectly with Shopify, WooCommerce, Stripe, etc.
🔗 Get your free $5/month here →
Other platforms like Railway or Render also work—but ClawCloud offers more generous free limits and better performance for n8n.
🛒 E-commerce use case: Automatically sync Shopify orders → Airtable, send SMS via Twilio, or update Google Sheets inventory—all on a $0 budget.
🖥️ Option 4: Self-Hosted VPS – Full Control, Maximum Power
Best for: Shopify entrepreneurs who want total freedom—run n8n alongside AI tools, custom bots, or “unofficial” automation scripts 24/7.
Unlike free tiers, a VPS (Virtual Private Server) is your own dedicated machine in the cloud. You own it, control it, and can install anything.
🔧 Step 1: Launch a VPS with Dokploy Pre-Installed
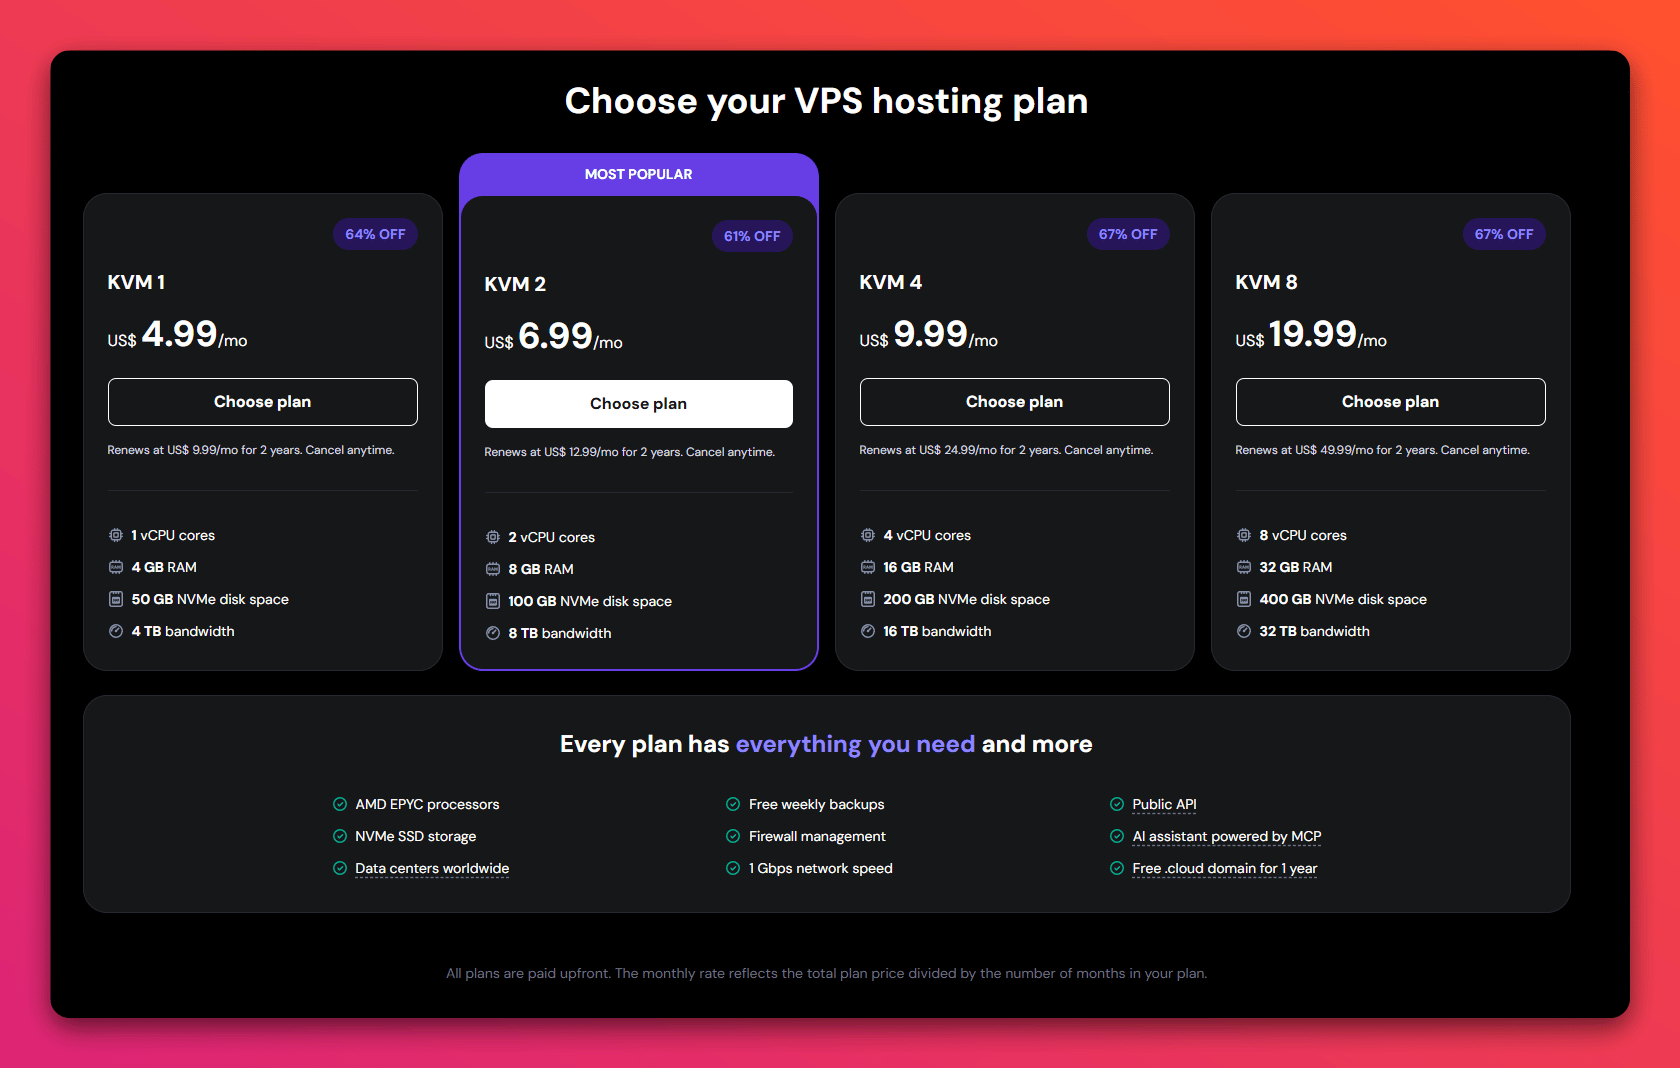
We recommend Hostinger for its beginner-friendly app marketplace:
- Go to
- Choose KVM2 (minimum) or KVM4 (recommended)
- On the setup screen:
- Operating System → Click “Panel + OS”
- From the dropdown, select “Dokploy”
→ This automatically installs Ubuntu + Dokploy in one click
- Choose a data center location near you.
- Complete checkout
✅ Within 1–2 minutes, your server is ready—with Dokploy already running!
🚀 Step 2: Access Dokploy & Deploy n8n
- In Hostinger’s hPanel, click Manage Panel.
- On first visit, register an admin account (email + password)
- Click “+ New Project” → Name it (e.g.,
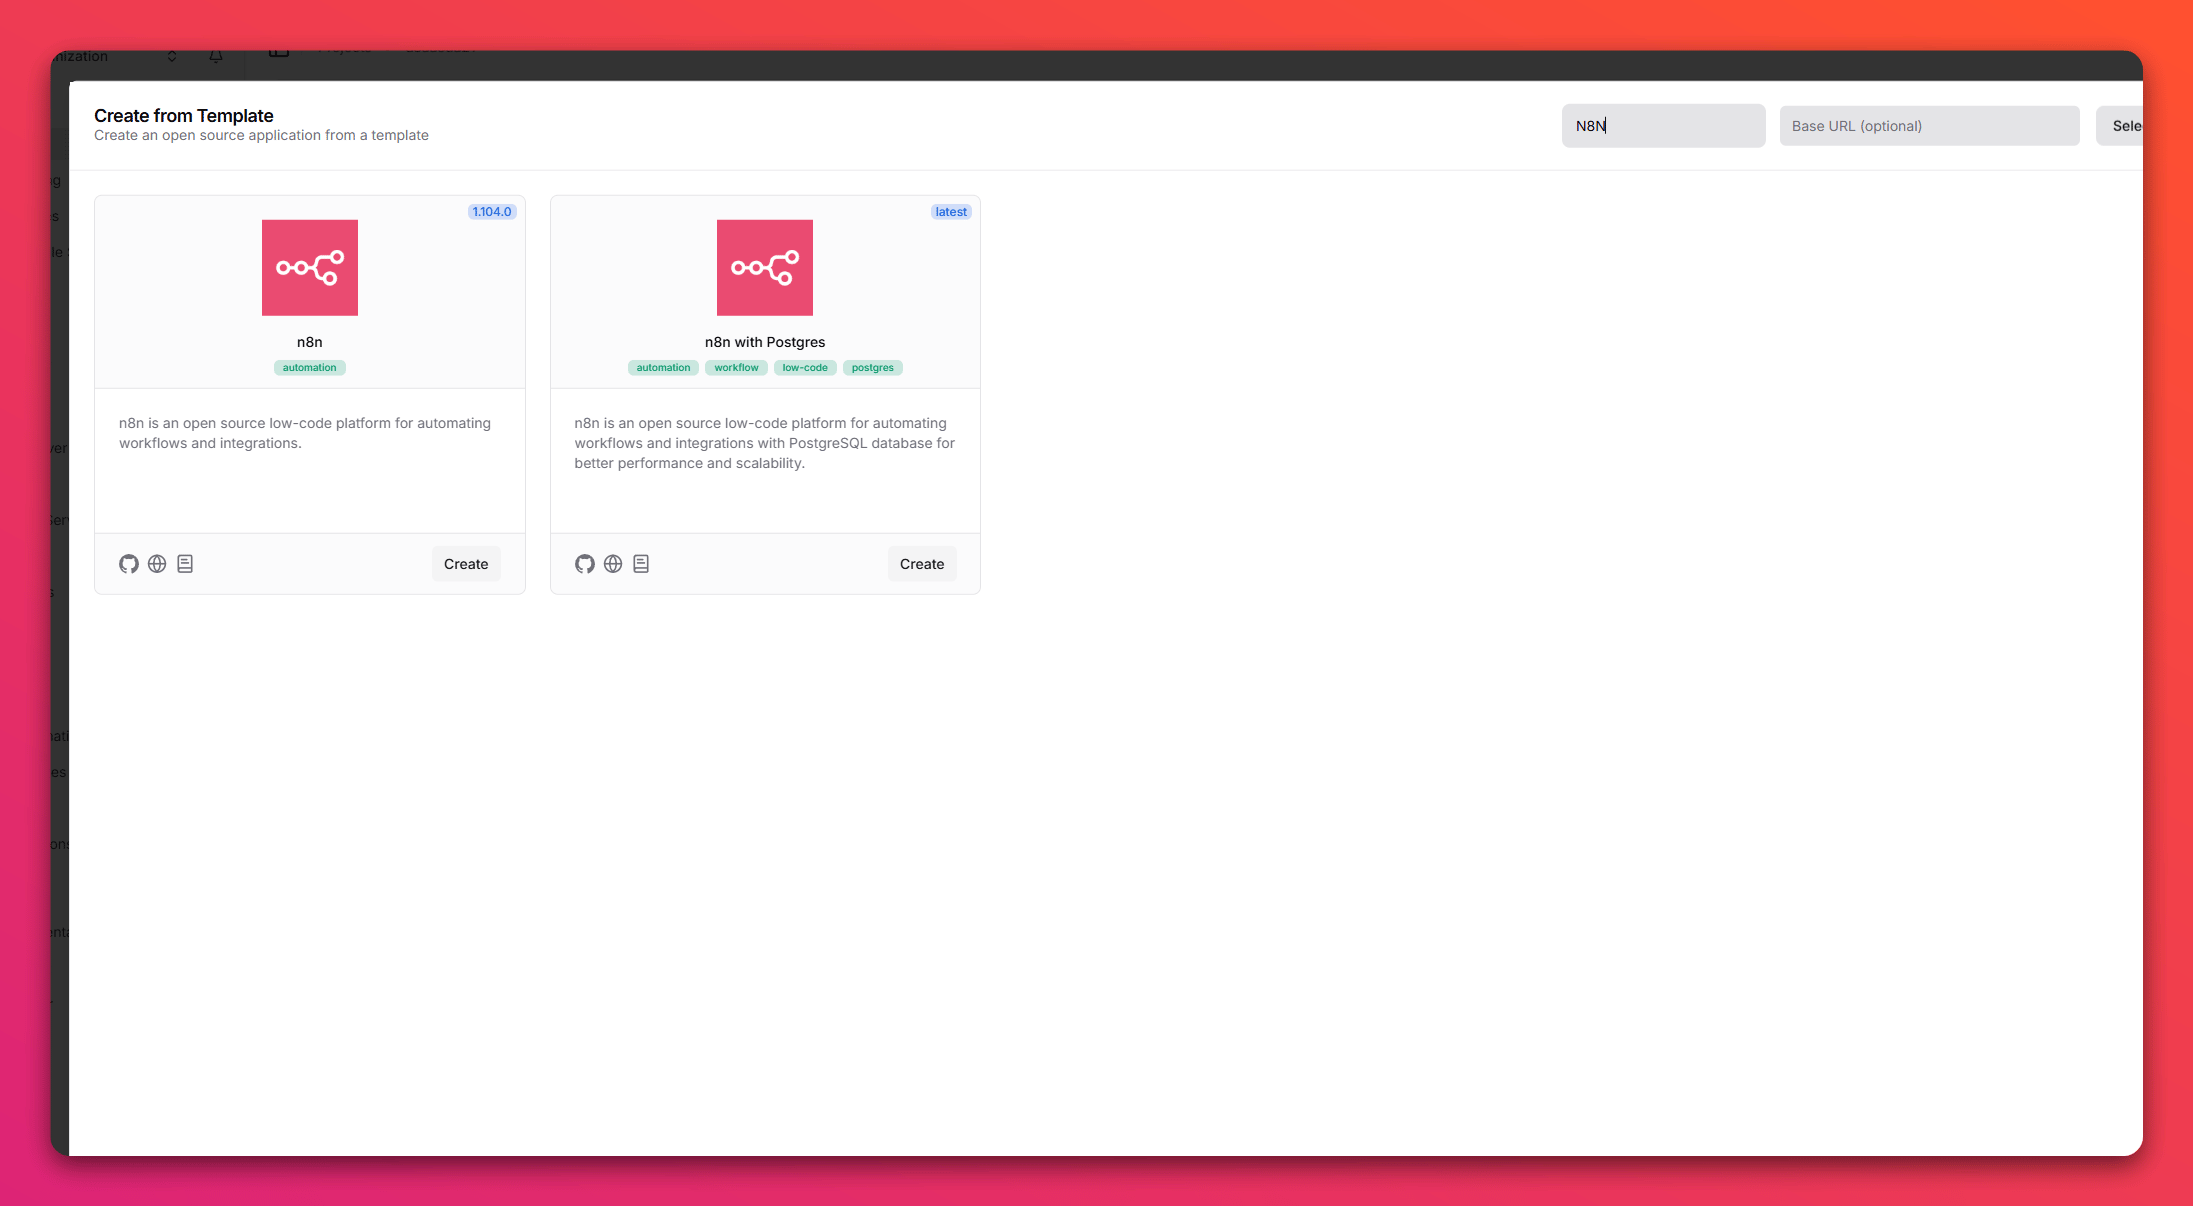
shopify-automations) → Create - Inside the project, click “+ Add Service” → Choose “Templates”
- Search for
n8n→ Select the official template → Click “Deploy” - Wait ~30 seconds for deployment to finish
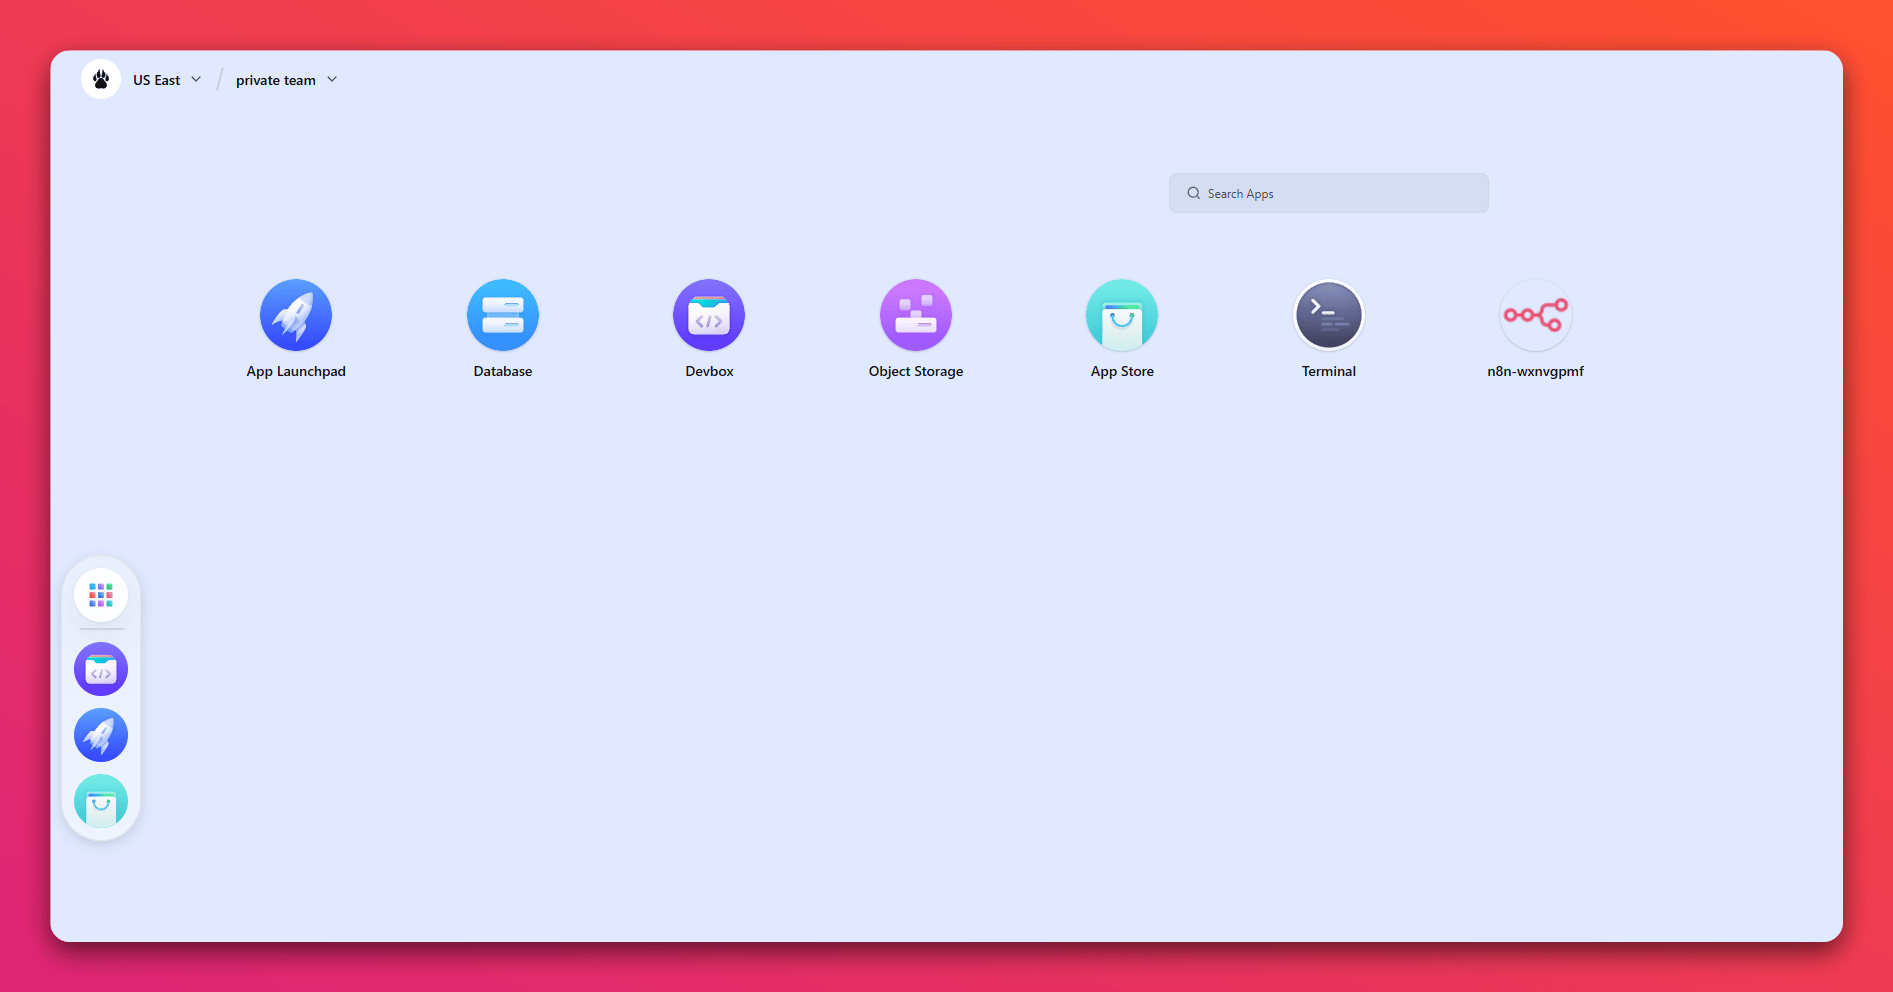
🔓 Step 3: Access Your Live n8n Instance
- Back in your project dashboard, find the n8n service card
- Click the “Open” button (or copy the public URL)
- You’ll be redirected to your n8n login page
- Create your admin account on first launch
✅ You now have a fully self-hosted, public-facing n8n server—ready to connect to Shopify webhooks, Klaviyo, Google Sheets, or any API.
🌟 Why This Is Worth It
- ✅ 24/7 uptime – no laptop required
- ✅ Full root access – install AI models, scrapers, or custom tools
- ✅ One-click updates via Dokploy
- ✅ Scalable – upgrade RAM/CPU anytime
🔮 Perfect for: AI customer service bots, real-time inventory sync, or automated product research—all under your control, forever.
🔚 Start Automating—For Free
n8n gives you Zapier-level power without the price tag. And in 2025, you don’t need to be a developer to use it.
👉 For most Shopify store owners, ClawCloud Run is the sweet spot: free, public, and production-ready.